Free Arm Knitting Pattern - Braid Stitch
 |
| arm knitting braid infinity scarf |
Arm knitting is easy and fast and all you need is some yarn and your arms - oh and about an hour of your time. Once you start making these you can't stop.
I had a couple of mishaps along the way. First of all you really need thick yarn - this one uses four strands worked together.
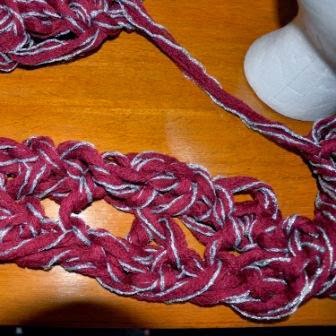
To make a braid type stitch you need to work in groups of three. The first braid type one I tried I used 9 stitches and really didn't like the finish. It didn't help that I used thinish yarn
It is useful to let you see what it looked like - bunches around your neck it was okay but I confess this one ended up back as a ball of yarn.
 |
| How to make a braided stitch with arm knitting |
 |
| 9 stitch braided stitch with arm knitting |
What you need to make this infinity scarf:
2 balls of Sidar Glam yarn - each ball is 100g or 40m
Method:-
Cast on (bind on) 6 stitches - the best video on casting on for arm knitting is this one.
I cast on to my right arm using this method. I like to give each stitch a twist before I transfer it to the new arm, it just makes it a bit tighter and neater.
- You will need a tail of yarn long enough to create 6 stitches. Measure that by wrapping the yarn around your hand very loosely 7 or 8 times.
- Cast on 6 stitches to your right arm.
- Form a base row by straight arm knit first row. Hold the yarn from the ball of wool (NOT the tail) in your right hand, loop the first stitch - the one closest to your thumb - over your hand and over the yarn you are holding. This forms a new stitch. I like to give it a twist as I transfer it to my left arm.
- Continue with the remaining stitches until they are all on your left hand.
- Mentally number your stitches number 1 to 6 starting at 1 with the stitch nearest your thumb. You will be working in two lots of three stitches to give it a braided look.
- Remember, hold your working yarn from the ball in the same hand the stitches are on. So loop stitch number 3 over your hand and the yarn to create a new stitch, twist it and transfer it to your right arm.
- Loop stitch number 2 over your hand and the yarn for a new stitch, twist and transfer.
- Loop stitch number1 over your hand and the yarn for a new stitch, twist and transfer.
- Loop stitch number 6 over to create a new stitch etc
- Loop stitch number 5 over etc
- Loop stitch number 4 over etc so you now have all 6 stitches on your right arm.
- Repeat in the opposite direction until you the end of the yarn.
- Leave enough to cast off so keep an eye on it, nothing worse than having to unravel a row just because you don't have enough left.
- The last row is a straight knit - knit stitch number one and two - then loop the second stitch over the first and drop it - just like you do with normal knitting. Just remember to slip the end of your yarn through the last loop to make a knot so it doesn't unravel.
- Sew or knot the ends together - I actually left the ends after knotting them as I liked the ribbon effect they create.
Watch the video if you are unsure of how to cast off your stitches
 |
| infograph for arm knitting part 1 |
 |
| infograph for arm knitting part 2 |
 |
| how the braid stitch looks |


No comments:
Post a Comment